
Although teeth can be cleaned by brushing, it is not effective in reaching the adjacent tooth surfaces – adopting a tooth-cleaning technique called flossing can be used for this instead. This procedure involves a short piece of thread-like material, called floss, used to clean areas that are difficult to reach with a toothbrush.
When to floss?
The recommendations for brushing is twice a day. However there is no ideal time to floss – whenever individuals find time to floss properly it can be done. During sleep, both saliva flow and teeth protection reduce, hence flossing during night or once in 24 hours is a good option.
Similar to the toothbrush, a piece of floss should not be shared as it may introduce bacteria in the mouth. People have questions about reusing the floss more than once after rinsing and drying, as it is believed that oral bacteria may not survive dry conditions. However, the floss may lose its potential cleaning efficiency after a single use and it may redeposit the bacteria back in the mouth. in light of this, it is advisable to use a piece of floss only once.
Brushing after flossing is advantageous as during brushing toothpaste has direct access to teeth and when we spit out and rinse frequently, it helps to dislodge debris if it still remains in between or around the teeth.
Some common flossing mistakes are holding the floss with the same fingers used for manipulating the floss. While this may not pose difficulty to floss the front teeth, it may be difficult to reach the back ones. Also, using a short piece can hinder the efforts.
Flossing techniques
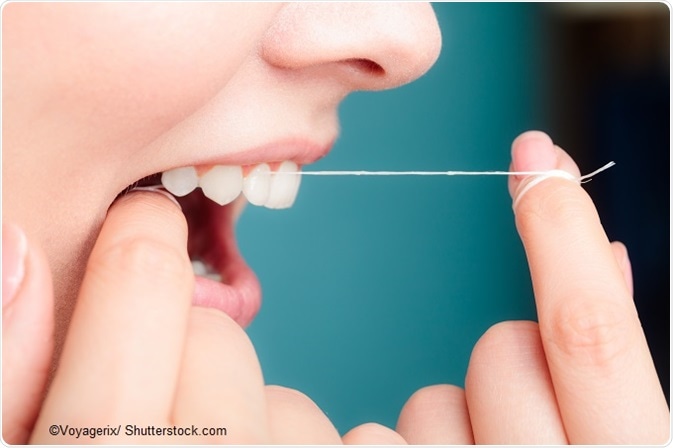
- Wrap roughly 18 inches of floss around the two middle fingers; the remaining floss can be secured around the preferred fingers of the other hand. Hold the floss firmly between your thumbs and forefingers – this will help to free up the thumbs and index fingers, as it is these fingers that will manipulate the floss. Splitting the two tasks—holding and working the string—makes flossing easier to accomplish.
- The floss should be manoeuvred between the teeth with a gentle rubbing motion and curved against one tooth until the floss meets the gum line. Slide the floss gently between the gum and the tooth.
- The floss should be held firmly against the tooth and rub along the surface of the tooth with a gentle up and down movement. This should be continued until the back side of the last tooth is reached. Follow this process for the remaining teeth.
- A new section of the floss should be used when plaque builds up on it.
Another method to clean between and around the teeth is water flossing. It is a handheld device that sprays water steadily to remove debris in the teeth, much similar to traditional floss. For individuals using braces or permanent fixed bridges, water flossers can be of great help. It is proven that water flossers are safe to use and effective in removing dental plaque.
Method of using floss holder
Some people may find it difficult to clean the posterior teeth or adjacent tooth surfaces of the posterior teeth or interdental space. Another point to consider is that the improper use of dental floss can cause injury or harm. It is good to use a floss holder as it is helpful for people who find it difficult to control the dental floss.
Step 1: Change the floss holder from the left to the right; slowly slide the floss toward the gingival margin and pull it firmly against one of the nearby tooth surfaces.
Step 2: Gradually slide the floss up and down to clean the nearby tooth surface starting from the deepest part of the gingival sulcus and pull the floss firmly against the other nearby tooth surface.
Step 3: Clean all the other adjacent tooth surfaces as per the above steps.
Flossing orthodontic devices
Individuals wearing orthodontic devices may find it difficult to floss. The suggestion is to use a superfloss that will help to remove dental plaque in the adjacent tooth surfaces.
- Press the hardened end through the space in between the teeth and the orthodontic device.
- Wrap the end of the floss around the middle fingers and hold it tightly between the thumbs and forefingers of both hands; leave about 2 cm of floss in between.
- Pull the floss to the interdental space gently using a sawing motion.
- Wrap the floss around one tooth in a "C" shape, pull down to the deepest part between the tooth and the surrounding gingival tissue, slide up and down, and clean the surface.
- Wrap around the neighboring tooth and repeat the procedure
Although there is no hard and fast rule to select the type of floss, two parameters to consider while selecting the type of floss are the size of the floss and the ease of flossing. People assume that as we go grow older, we will naturally lose our teeth. However, by keeping teeth and gums healthy, teeth can be made available throughout life.
Sources
- http://www.toothclub.gov.hk/en/en_teens_02_03_03_03.html
- http://www.mouthhealthy.org/en/az-topics/f/flossing
- http://www.ada.org/en/member-center/oral-health-topics/floss
- http://www.mouthhealthy.org/en/az-topics/f/Flossing%20Steps
- www.ada.org/…/statement-from-the-american-dental-association-about-interdental-cleaners
- https://www.adha.org/resources-docs/7222_Proper_Flossing.pdf
Further Reading
- All Dental Hygiene Content
- Flossgate & the Importance of Preventative Oral Hygiene
Last Updated: Aug 23, 2018
Source: Read Full Article